Are you looking to create and set up a Google SPF record for your Google Workspace? You’ve come to the right place.
There can never be enough protection and cybersecurity in today’s digital world. While large data breaches, distributed denial-of-service (DDoS) attacks, and other major cyber attacks loom large, one cybersecurity threat often flies under the radar: fake or malicious emails.
Email security may not always be at the forefront of an organization’s mind, but almost everyone in an organization has an email registered to the organization’s domain. In fact, by 2027, 408.2 billion emails will be sent per day. But how many of those are actually safe, authorized, and legitimate?
To put a number on it, a total of 3.4 billion spam emails get sent every single day. That’s 3.4 billion opportunities for a cyber attack.
Setting up a Google SPF record for your Google Workspace is one way to mitigate those chances. Below, we’ll walk you through everything you need to know about SPF records, including how they work, their importance, and the step-by-step process for creating and setting up an SPF record for your Google Workspace.
| Key Takeaways: – Set up an SPF record for Google Workspace to prevent spoofing, protect your brand reputation, and improve email deliverability. – Avoid common SPF mistakes such as multiple records, +all, or missing Google’s SPF mechanism, and always test your record with an SPF checker.– Pair SPF with DKIM and DMARC for a complete email authentication strategy that stops phishing attacks and secures your domain. |
What is a Google Workspace SPF record?
Think of a Google Workspace SPF record as your email’s ID card. It’s a simple text file that tells receiving mail servers, “Hey, these are the legitimate servers that can send email from my domain.” When you use Google Workspace (formerly G Suite) for your company email, you need this record to prove that Google’s servers are allowed to send email on your behalf.
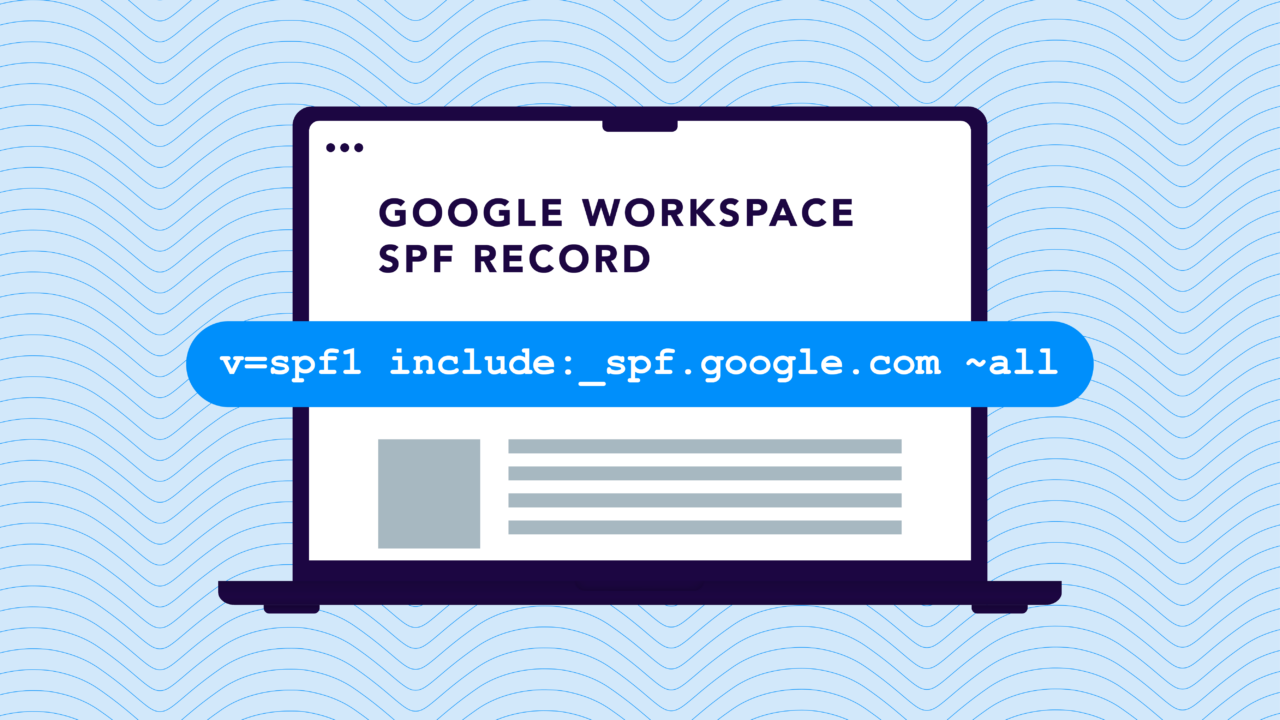
The record itself is pretty straightforward – it’s just a single line of text that lives in your domain’s DNS settings. For Google Workspace, the basic record looks like this:
v=spf1 include:_spf.google.com ~allHere’s what all that means:
v=spf1tells servers this is an SPF record.include:_spf.google.comsays “Yes, Google’s servers can send email for me.”~allmeans “These are my approved senders, but if you get mail from someone else, just flag it as suspicious.”
If you’re using other services to send email besides Google Workspace (like marketing tools or support desk software), you’ll need to add them to this record too. It’s like adding authorized users to your company’s security badge system—you want to include everyone who legitimately needs access, but no one else.
Why you need a Google SPF record
Email is still one of the most common ways malware can infect your company’s network. According to PurpleSec’s latest Cybersecurity Trends report, malicious actors deliver malware through email 92% of the time.
Fortunately, users can use email authentication practices to protect against cyberattacks.
Sender Policy Framework (SPF) is the most common authentication mechanism in play for email today. SPF ensures the email you receive is from a server authorized to send emails on behalf of the domain. It ensures that any suspicious attackers or spoofers do not send emails on your domain’s behalf.
Use our SPF checker to check your SPF record for free:
Check your
domain now
Enter your domain to see if it’s vulnerable to spoofing or if others are sending emails on your behalf. Instantly check your DMARC, SPF, and BIMI status with a detailed security report.
You’re not fully protected, learn more here.
Check your
domain now
Enter your domain to see if it’s vulnerable to spoofing or if others are sending emails on your behalf. Instantly check your DMARC, SPF, and BIMI status with a detailed security report.
You’re not fully protected, learn more here.
Check your
domain now
Enter your domain to see if it’s vulnerable to spoofing or if others are sending emails on your behalf. Instantly check your DMARC, SPF, and BIMI status with a detailed security report.
You’re not fully protected, learn more here.
Your Domain
Not protected AGAINST IMPERSONATION ATTACKS
DMARC NOT AT ENFORCEMENT
exampledomain1.com
Authentication Status for January 10, 2025
DMARC at Enforcement
SPF Record Configured
BIMI Ready
exampledomain1.com
Authentication Status for January 10, 2025
DMARC at Enforcement
SPF Record Configured
BIMI Ready
How does SPF work?
Email might feel safe and familiar, but it’s actually the favorite route for cybercriminals to sneak malware into company networks. In fact, when malware shows up at your company’s digital doorstep, it’s come through email 92% of the time (according to PurpleSec’s latest research).
Your emails come with a “from” address. Spammers may forge these “from” addresses in an attack and send fake messages from a legitimate domain name—yours.
To detect fake emails like these, receiving servers perform SPF checks to ensure the messages come from email servers authorized to send emails from your domain. To perform an SPF authentication, the receiving server performs a DNS lookup using the domain name to check the SPF record and ensure that the server the message is coming from is properly listed.
If the server or IP address is listed, the address is authorized to send emails from the sender’s domain. The email passes the SPF check and can thus be routed to one’s inbox.
However, if the IP address is not on the sender’s DNS records, the receiving server may flag the email as spam or reject the message outright.
Do I need to set up an SPF record?
Yes.
Using SPF along with DMARC protects your domain from harmful cyberattacks that can potentially damage customer relationships, work productivity, and your bottom line.
Strong email authentication has three components: SPF, DKIM, and DMARC. These methods work together to help users mitigate spoofing and phishing attacks. To read more on SPF, DKIM, DMARC, and how SPF combined with DMARC can help stop malicious attacks, view any one of our guides below:

Creating an SPF record for your domain can help prevent your domain from being used in malicious attacks, protecting your email delivery rates and your organization’s reputation.
Common SPF record mistakes to avoid for Google Workspace
When setting up SPF, it’s easy to make small errors that cause big problems with email deliverability and security. Here are some common SPF records to avoid when using Google Workspace:
1. Using v=spf1 +all
- Example:
v=spf1 +all - Why it’s bad: This record essentially says “accept mail from any server, anywhere.”
- Result: Spammers can freely impersonate your domain, making this one of the worst possible SPF records to publish.
2. Using ?all (Neutral)
- Example:
v=spf1 include:_spf.google.com ?all - Why it’s bad:
?alltells receiving servers not to enforce SPF checks. Spoofed or unauthorized mail can still slip through. - Result: Your SPF record exists but provides little to no protection.
3. Overly restrictive -all without testing
- Example:
v=spf1 include:_spf.google.com -all - Why it’s risky:
-allis a hard fail, which means any email from an unauthorized server is rejected outright. - Problem: If you forget to include a legitimate service (like Mailchimp, Salesforce, or Zendesk), important messages may get blocked.
- Best practice: Start with
~all(soft fail), monitor with DMARC reports, then move to-allonce you’re confident everything is included.
4. Duplicating SPF Records
- Example:
v=spf1 include:_spf.google.com ~all v=spf1 include:example.com ~all - Why it’s bad: Domains should only have one SPF TXT record. Multiple SPF records cause validation errors, leading to SPF “permerror” failures.
- Solution: Combine all senders into a single SPF record instead.
5. Exceeding the 10 DNS Lookup Limit
- Example (too many “include” tags):
v=spf1 include:_spf.google.com include:spf.mailservice.com include:spf.emailtool.com include:spf.marketing.com ... ~all - Why it’s bad: SPF allows only 10 DNS lookups. Exceeding this limit causes SPF to fail automatically.
- Solution: Use Valimail’s SPF macro, Instant SPF®, to avoid SPF flattening.
6. Forgetting to Add Google’s SPF Mechanism
- Example:
v=spf1 ~all - Why it’s bad: Without
include:_spf.google.com, Gmail and Workspace servers aren’t authorized to send mail for your domain. - Result: Legitimate mail from Google Workspace can fail SPF and get rejected or flagged as spam.
By avoiding these common SPF records and configurations, you can ensure your Google Workspace SPF record is secure, effective, and reliable.
Step-by-step: How to create a Gmail SPF record
It takes just one act to infect a computer and potentially compromise an entire organization.
Fortunately, given the right tools and information, even the most invasive attacks can be thwarted.
Before you start, make sure that you know which mail server your organization uses to send emails. This tutorial will be more helpful to you if you use Google Workspace (formerly Google Apps/G-Suite), but it may also be used with other mail servers.
Here are a few simple steps you can take today to prevent phishing attacks.
1. Sign in to your domain account
First, sign in to your domain provider and navigate to the page where you can update your domain’s DNS records. Accessing the DNS records will vary depending on which provider you use.
Here’s how you can access your DNS records using GoDaddy or Namecheap.
If you don’t know where to access your DNS records, you can search your domain provider’s knowledge base to see where your DNS settings or manager is located.
2. Look for TXT records
Once you arrive at the DNS manager, you’ll see multiple types of records, such as A, CNAME, MX, TXT, SRV, and AAAA. SPF records are plain text files, so navigate to the TXT section to add your SPF record.
3. Set up a TXT record
You can use the default values for the host and TTL fields and the value/text field to list the mail servers you use to send emails.
However, if you add an SPF record for a specific subdomain, fill in the “host” field with the subdomain’s name.
SPF records can have up to 255 characters. Here’s what the syntax for an SPF record looks like:
v=spf1 include:_spf.google.com include:example.com ip4:192.72.10.10 ~allIn this example, the user is sending emails from:
- Google Workspace’s server (google.com)
- A third-party server (example.com)
- A server with the IP address 192.72.10.10.
Let’s break down some of the tags we use in this example.
- “v=spf1” is the version of the SPF record used
- The “include:” tag lets your SPF record the addresses of authorized domains.
- The “ip4” tag includes IPv4 addresses, and you can also use the “ip6” tag if you use IPv6 addresses
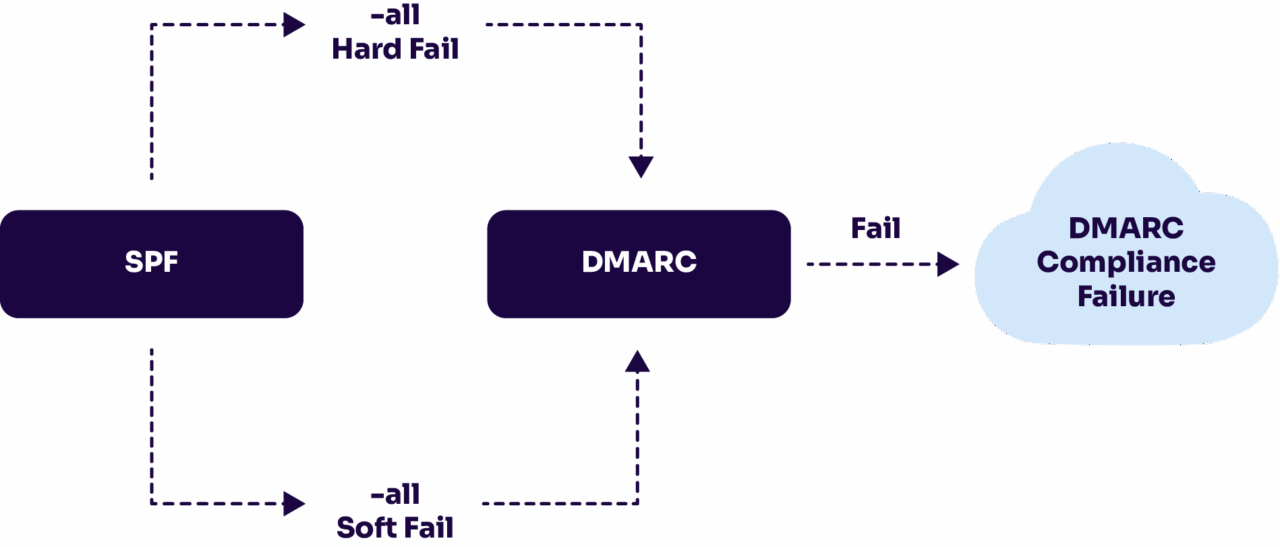
- The “~all” tag, or the soft fail qualifier, means that the receiving server should accept the email anyway if it’s not in the SPF record but mark it as suspicious. Alternatively, you can also use the “-all” tag or a fail qualifier, which means that messages from servers that aren’t included in your SPF record should be rejected.
Knowing these four tags will help you with a basic setup. If you’re only using Gmail to send your emails, this is how to SPF TXT record would look like:
v=spf1 include: _spf.google.com ~all4. Save the SPF record
Once you’re done, hit save. To be safe, check on your DNS manager to ensure the record is there. The new record will activate within 48 hours of saving.
How to check and troubleshoot your Google Workspace SPF record
After setting up your SPF record, the next step is making sure it works correctly. A misconfigured SPF record can cause Gmail messages to be directed to spam folders, or worse, rejected entirely. Here’s how you can check and fix common issues:
1. Use an SPF checker tool
To confirm your SPF record is valid:
- Enter your domain into an SPF record checker (like Valimail’s free domain checker).
- The tool will run a DNS lookup and return your SPF record.
- Look for errors such as multiple SPF records, missing Google’s mechanism, or exceeding the 10-DNS-lookup limit.
2. Test email deliverability in Gmail
Send a test email to a Gmail account and check the headers:
- Open the email in Gmail.
- Click the three dots (More) → Show Original.
- Look for the line:
spf=pass→ Your SPF record is working.spf=failorpermerror→ There’s a configuration issue.
3. Fix common Google Workspace SPF errors
Here are quick fixes for the most frequent mistakes:
- Error: “No SPF record found” → Add
v=spf1 include:_spf.google.com ~allto your DNS TXT records. - Error: “Too many DNS lookups” → Simplify your SPF record or use an SPF flattening tool.
- Error: “Multiple SPF records” → Merge them into a single TXT record.
4. Monitor with DMARC Reports
SPF alone isn’t enough—you’ll want visibility into how your record is performing. Pair your SPF setup with a DMARC policy so you can:
- See which servers are sending mail on your domain’s behalf.
- Identify unauthorized senders.
- Gradually move from monitoring (
p=none) to protection (p=quarantineorp=reject).
| Pro tip: Always retest your SPF record after making DNS changes. Propagation can take up to 48 hours, and it’s easy to miss a misstep that impacts email deliverability. |
Double-down your email security with DMARC
You’re one step closer to securing your emails now that you’ve set up your SPF records for Google Workspace. SPF, however, has its limitations. For example, its syntax alone makes it easy for a typo to slip in and make legitimate emails fail the SPF check. Additionally, SPF breaks when an email is forwarded, undermining all the efforts that preceded it.
For these reasons, it’s highly recommended to integrate DKIM into your email security authentication protocols. Additionally, it’s recommended to add a DMARC record to your domain and has that record use a policy of Quarantine to ensure complete protection.
Using DMARC enforcement and a comprehensive authentication plan, senders can improve email deliverability and maintain brand integrity.
Need a simple way to authenticate email? Create a free account today or learn more about DMARC-as-a-service with Valimail.
FAQs about Google Workspace SPF records
What is the correct SPF record for Google Workspace?
The recommended SPF record for Google Workspace is:
v=spf1 include:_spf.google.com ~all
This tells receiving mail servers that Google’s servers are authorized to send email for your domain. If you use other email services (like Mailchimp, Salesforce, or Zendesk), you’ll need to add them to the same record.
How do I add SPF for Gmail?
To add SPF for Gmail:
- Sign in to your domain registrar or DNS hosting provider.
- Open the DNS settings and look for the TXT records section.
- Add a new TXT record with this value:
v=spf1 include:_spf.google.com ~all - Save the record and wait up to 48 hours for changes to propagate.
This ensures Gmail can verify that messages sent from your domain are legitimate.
Do I need both SPF and DKIM?
Yes. SPF and DKIM serve different purposes but work best together:
- SPF verifies which mail servers are allowed to send email for your domain.
- DKIM adds a cryptographic signature that ensures the message content hasn’t been tampered with.
When combined with DMARC, these protections provide a complete defense against spoofing and phishing attacks.
What happens if I don’t set up SPF?
Without SPF, any attacker can spoof your domain and send fake emails that look like they’re from you. This can:
- Damage your brand reputation
- Cause legitimate emails to land in spam folders
- Open the door to phishing attacks against your customers or employees
In short, no SPF means no control over who sends emails on your behalf.
Does Gmail automatically use SPF?
Yes. Gmail automatically checks incoming messages against the sending domain’s SPF record to verify legitimacy. However, Gmail does not create an SPF record for your domain. You must publish one in your DNS settings. Without an SPF record, your outgoing Gmail messages may fail authentication and land in spam folders.
Why is my Google Workspace SPF record failing?
Your SPF record may fail for several reasons:
- You published multiple SPF records instead of one.
- Your record is missing the required
include:_spf.google.commechanism. - You exceeded the 10 DNS lookup limit.
- You used an incorrect qualifier, such as
+allor?all.
To fix SPF failures in Gmail, merge your senders into a single TXT record, simplify includes, and always test changes with an SPF checker.